Slicing (Edison+)
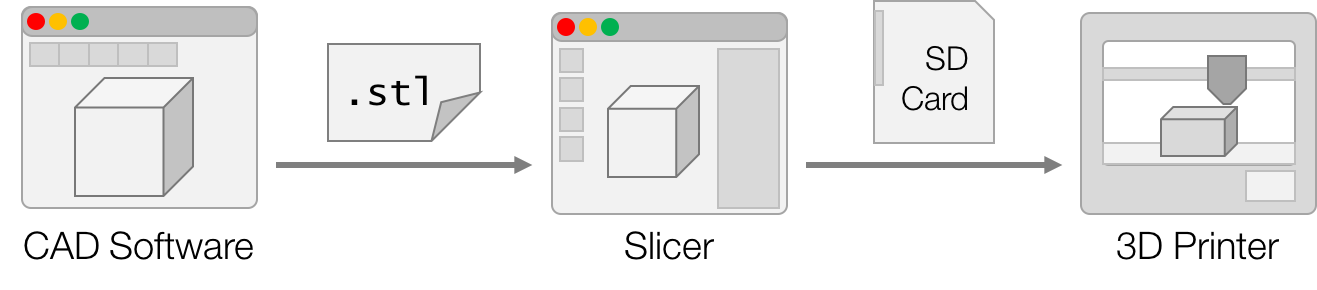
Slicing, or toolpath generation, is preparing your model for 3D printing.
Quick Summary
Slicing Software: CreatorK 9.0
Build Plate Size (mm): 225 × 145 × 200
Model Preparation
In your 3D CAD software (Solidworks/Rhino/Inventor etc.), export your 3D model into a .stl file. If prompted, remember to select the units (e.g. mm) that you designed the model in. You may need to reorientation of the model for better output.
Software (CreatorK)
Install the CreatorK 9.0 software from the SD card provided with the Edison+ printer.
You may also download the installer from this link.
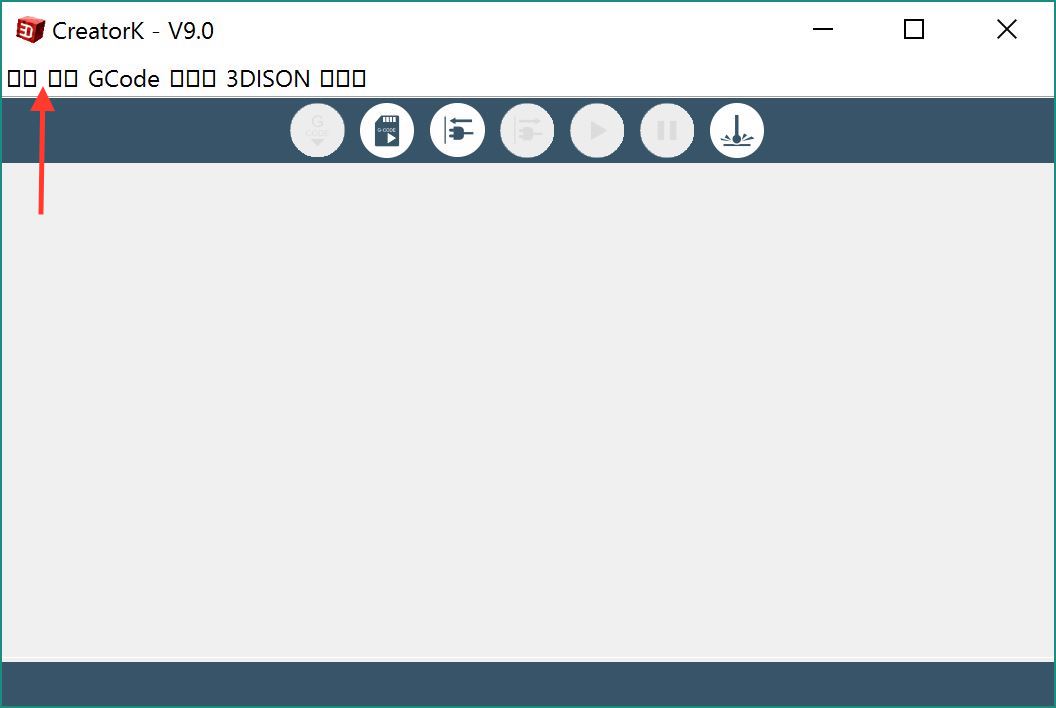
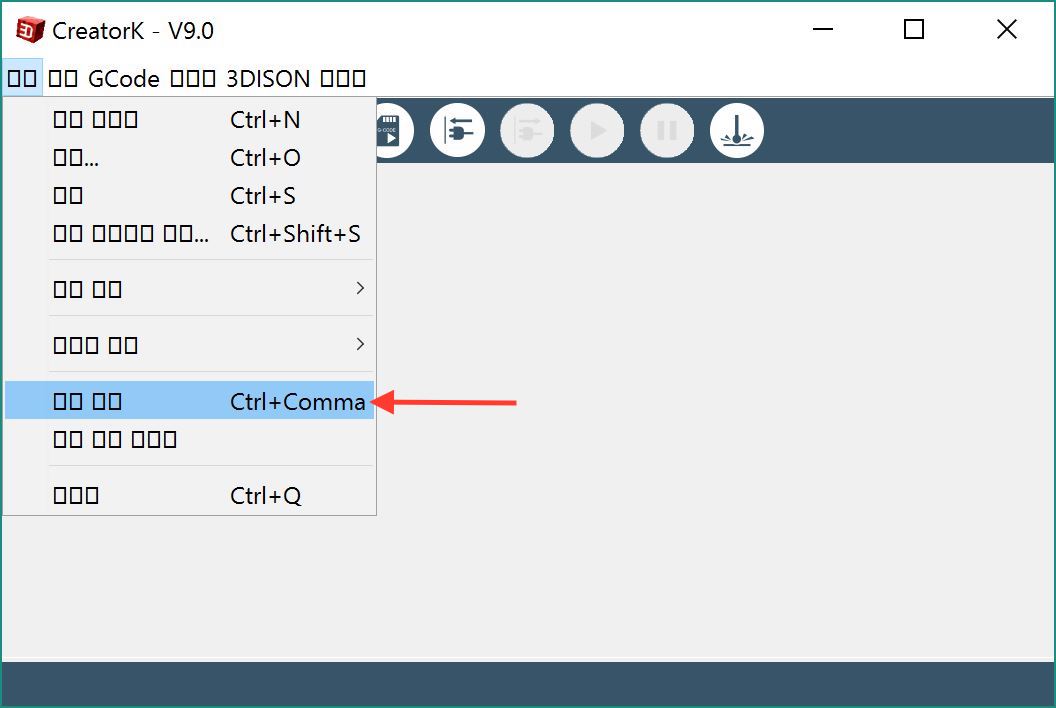
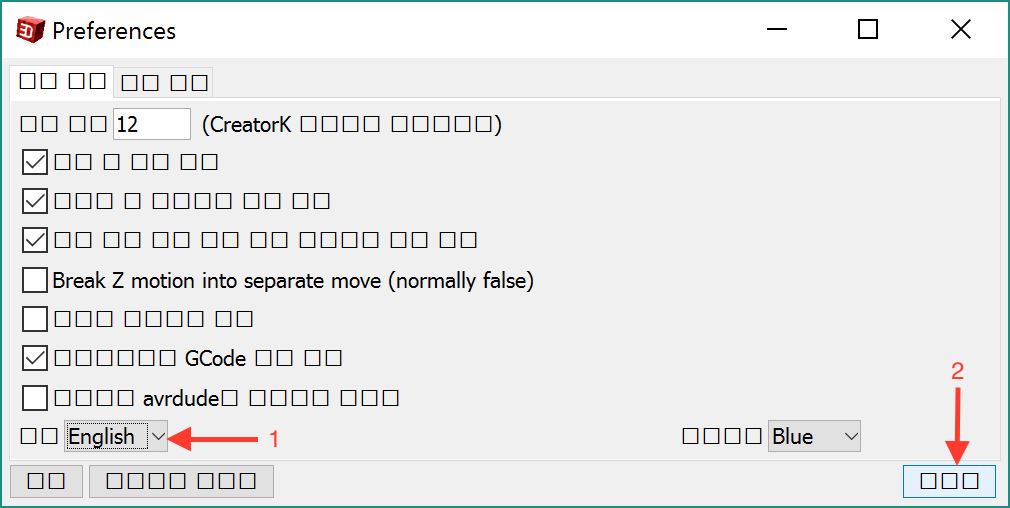
By default, the software will be in Korean. Follow the steps in the screenshots below to change the language to English.
You will need also to change some settings in CreatorK.
Under the menu, Select Machine → Machine Type (Driver) → The Edison+ Single.
Next, Go to GCode → GCode Generator and make sure Skeinforge (50) is selected.
Generating Toolpath
Load the model (.stl) into CreatorK.
You may need to resize the window in order for the display to refresh. Ensure that the size and orientation of the model is correct.
You may use the built-in tools in CreatorK to adjust the position of your model.
Take special care to ensure that the model is not floating or under the build plate.
You may center your model using the Move tool, and orientate it using the Rotate tool.
Your model should not exceed 90% of the build plate!
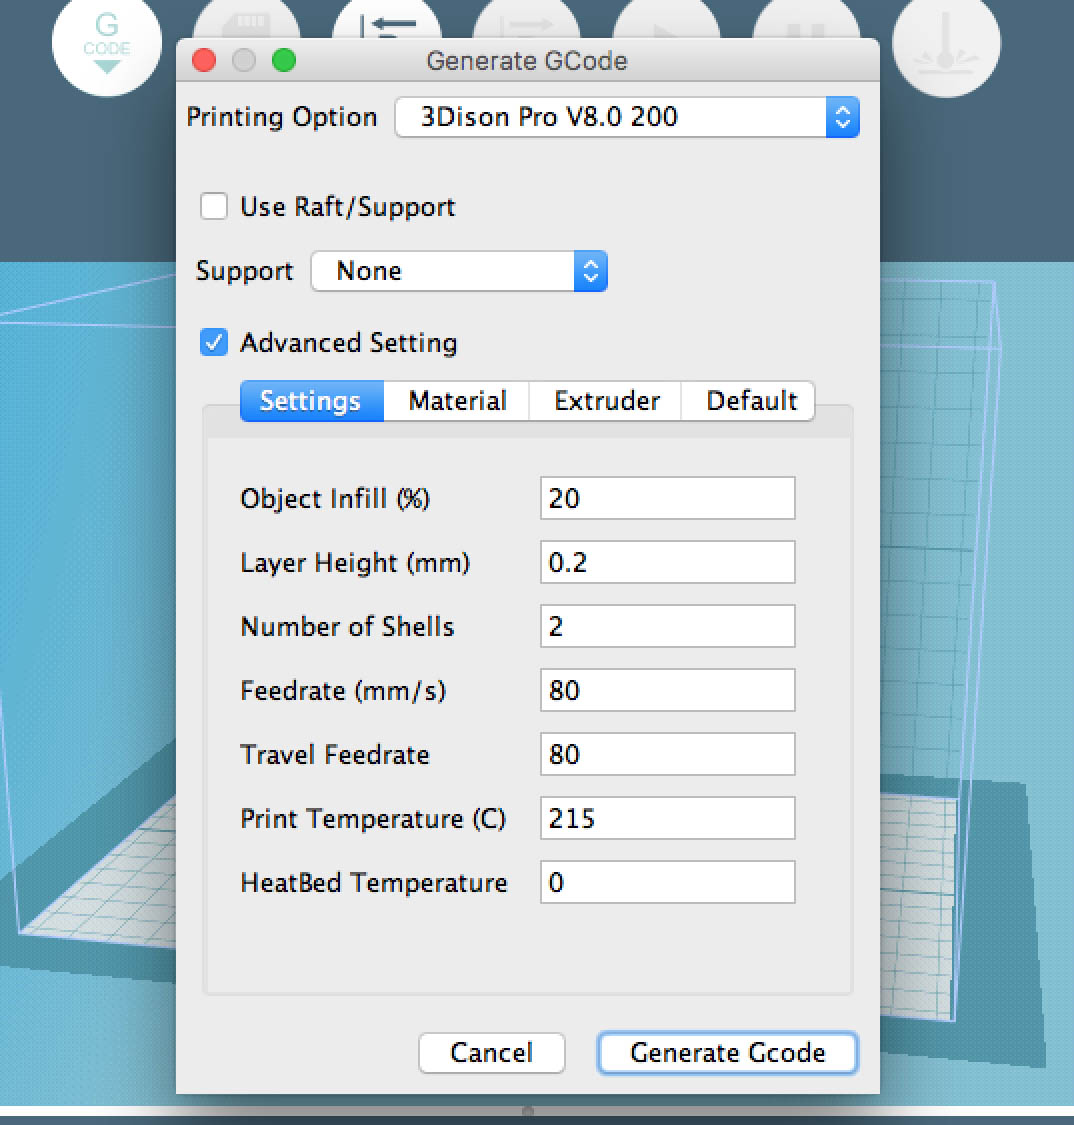
Recommended Settings
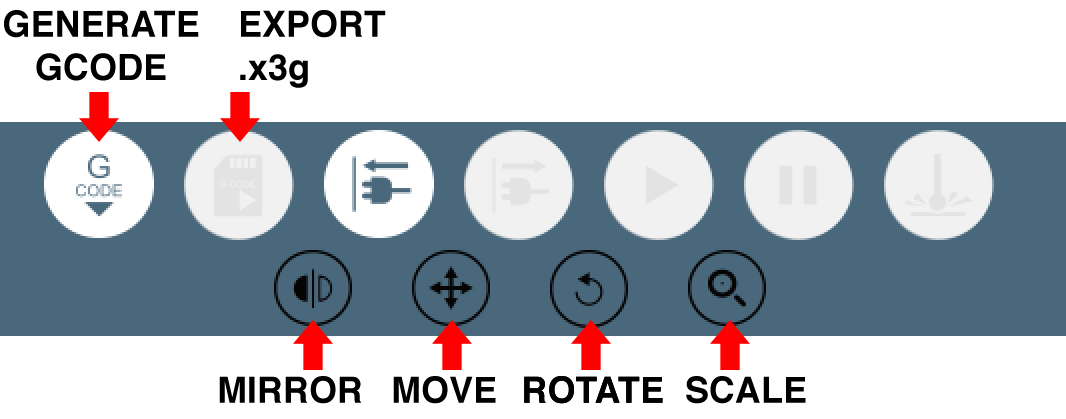
Transferring to Printer
Generate the GCode. This may take a while.
After the GCode is generated, open the message window (GCode > Message Window).
Next, select GCode > Estimate. Switch to the message window and you will be able to see the estimated printing time of the model.
Export the .x3g file and save it inside the SD card.
Slot the SD card into the printer with the label facing away from you.
You may like to review the printing procedure before you start printing.